|
|
Checkline TI-CMX Combination Ultrasonic Coating and Wall Thickness Gauge
Price: $ 2,175.00

Range: 0.025 - 9.999 inches | 0.63 - 254.0 mm
Resolution: 0.001" (0.01 mm)
Datalogging: NO
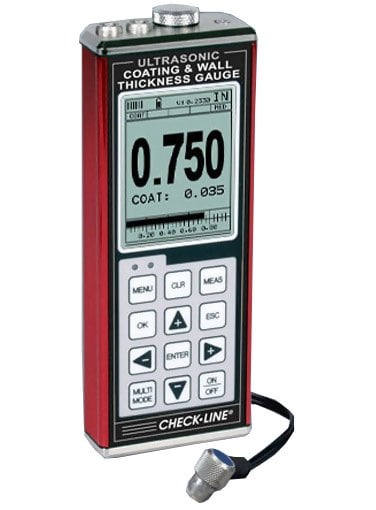
The Checkline TI-CMX Ultrasonic Coating & Wall Thickness Gauge measures both coating and wall thickness quickly and accurately - from only one side. In addition, when switched to Pulse-Echo mode, the Checkline TI-CMX Ultrasonic Coating & Wall Thickness Gauge automatically measures and eliminates the coating from the wall thickness measurement, enabling the user to locate the finest corrosion and pitting - without removing the coating. Oversized graphic LCD is backlit and features easy to read fonts, graphics and display codes showing all critical settings including Velocity, Operating Mode, Alarms, Scan Mode and more. The backlight can be set to ON (always-on), OFF (always-off) or AUTO (automatically-on when measuring). Five user-selected operating modes are included: - Coating On: Measures wall thickness using Pulse-Echo. It separately displays wall & coating thickness.
- Coating Off: Measures wall thickness using Pulse-Echo. It displays wall thickness only.
- Temperature Compensated: Measures wall thickness using Pulse-Echo and automatically adjusts calibration to compensate for changes in material temperature.
- Thru-Coat: Measures wall thickness only using Echo-Echo. (coating is NOT included)
- Coating Only: Measures coating thickness only

Kit Contents

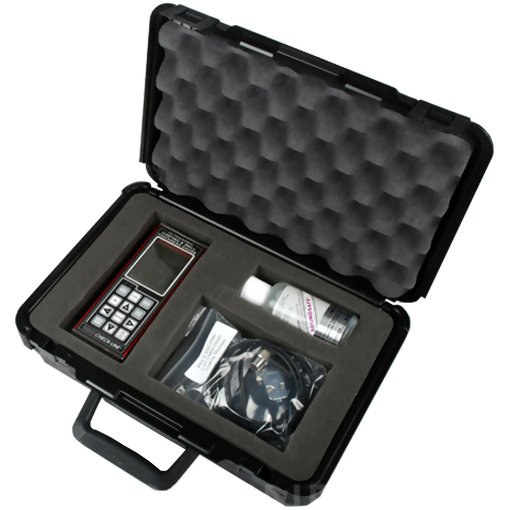
- Checkline TI-CMX Ultrasonic Coating and Wall Thickness Gauge
- Probe 4 oz.
- Bottle of coupling fluid
- 2 AA batteries
- NIST Calibration Certificate
- RS-232 cable
- Software
- Operating Manual
- Carrying Case
|  |

Features

- Auto probe recognition with Auto Zero or Manual Zero.
- Wide variety of dual-element probes can be used for nearly any application.
- Bar graph with user-set start end values providing highest resolution around the target thickness value.
- Differential Mode allows user to set a "target thickness value" and display will show the DIFFERENCE between actual and target thickness as a plus or minus value.
- Includes NIST-Traceable Calibration.
- CE Certified.
- Adjustable Gain in 5 steps (VLow, Low, Med, Hi & VHi) in 2db increments providing a 8 db gain adjust range (4250 db).
- 64 custom setups can be stored and retrieved for convenient use and labeled for easy identification
- Display Hi/Lo Alarm Limits with audible and visual indicators.
- 2 Year Warranty
- Metal housing provides strong protection against harsh environments.
- Measures Coatings up to 0.100"
 Specifications Specifications
| Range in Steel | Pulse-Echo Mode Pit and Flaw detection measures from 0.025 9.999inches (0.63 to 254 millimeters)
Echo-Echo Mode Thru Paint & coatings measures from 0.100 4.000 inches (2.54 to 102 mm). Range will vary depending on the thickness of the coating. | | Max Coating | 0.100" | | Resolution | .001 inches (0.01mm) | | Velocity Range | .0492 to .3936 in./ms
1250 to 9999 meters/sec | | Units | Inch or mm | | Measurement Modes | Pulse-Echo (corrosion mode)
Pulse-Echo Coating (Corrosion w/o coating)
Echo-Echo (thru-paint)
Temp Comp (auto adjust for material temp)
Coating Only (Ultrasonic Coating Gauge) | | Transducer Types | Dual Element (1 to 10 MHz). | | Output | RS-232 for upload/download of setups | | Memory capacity | TI-CMX None
TI-CMXDL over 200,000 measurements | | Power Source | Three 1.5V alkaline or 1.2V NiCad AA cells | | Battery Life | Typically operates for 150 hours on alkaline and 100 hours on NiCad | | Auto Power off | After 5 minutes of non-use | | Display | 1/8 in. VGA grayscale display 62 x 45.7mm | | Keyboard | Membrane switch with twelve tactile keys | | Case | Extruded aluminum body with nickel-plated aluminum end caps (gasket sealed). | | Operating Temperature | -14 to 140F (-10 to 60C) | | Weight, net | 383 grams | | Dimensions | 63.5 W x 165 H x 31.5 D mm | | Warranty | 2 year limited | | Certification | CE Approved, Factory calibration traceable to national standards |
 High Speed Scan Mode & B-Scan Mode High Speed Scan Mode & B-Scan Mode
Hi-Speed Scan Mode
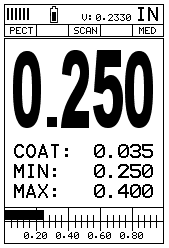
- Scan Mode measures 64 times per second, displaying the max and min reading measured during the scan interval. Sample rate is 200/sec when coating measurement is off.
|  |

B-Scan Mode
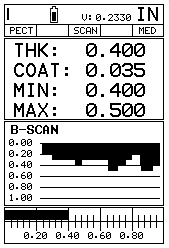
- The B-Scan displays a time based cross section view of test material of the contour of the blind, or underside of a pipe or tank application. the B-Scan view draws at a rate of seven seconds per screen from right to left.
|  |
 Measuring Limits Measuring Limits
 | Minimum Radius for Convex Surfaces | 0.350" (8.89 mm) | | Minimum Radius for Concave Surfaces | 3" (76.2 mm) |  | Minimum Headroom | 1" (25.0 mm) |  | Minimum Sample Diameter | 0.150" (3.8 mm) |  | Minimum Substrate Thickness - F | na | | Minimum Substrate Thickness - NFe | na |
 Optional Accessories Optional Accessories


V-Block
Transducer Holder
- The V-Block transducer holder offers the operator greater control and repeatabily when measuring on pipes and other curved areas
|  |
 Downloads Downloads
|
|
|