|
|
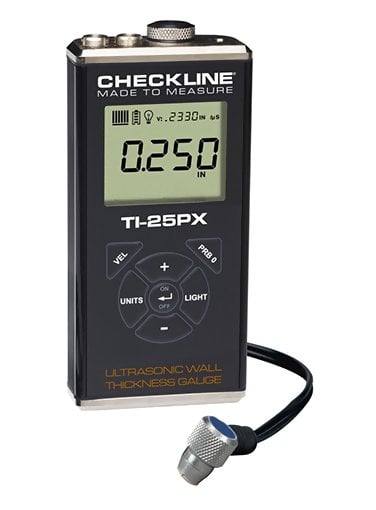
Checkline TI-25PX Adjustable Velocity Ultrasonic Wall Thickness Gauge
Price: $ 1,225.00

Includes NIST-Traceable Calibration Certificate, CE-Certified
5-Year Warranty, Made in USA
Datalogging: NO
Total Measuring Range (depends on material and transducer/probe type)
0.025 - 36.000 inches
0.63 - 914.4 mm Measuring Range on Steel (with standard T-102-2000 probe)
0.025 - 6.00 inches
0.60 - 150.0 mm The Checkline TI-25PX Wall Thickness Gauge is designed for measuring wall thickness and the extent of corrosion on a wide range of materials. It is commonly used for checking the thickness of pipes, tanks, plates and other objects. It is designed and built to withstand harsh industrial conditions and is backed by a 5 year limited warranty. The Checkline TI-25PX allows the operator to adjust the acoustic velocity (speed of sound through a given material) from 0.0120 to .7300 in/s. 305 to 18,542 meters/sec. The programmed velocity can be locked to prevent accidental adjustment. It is commonly used for applications where only a single material type is tested.

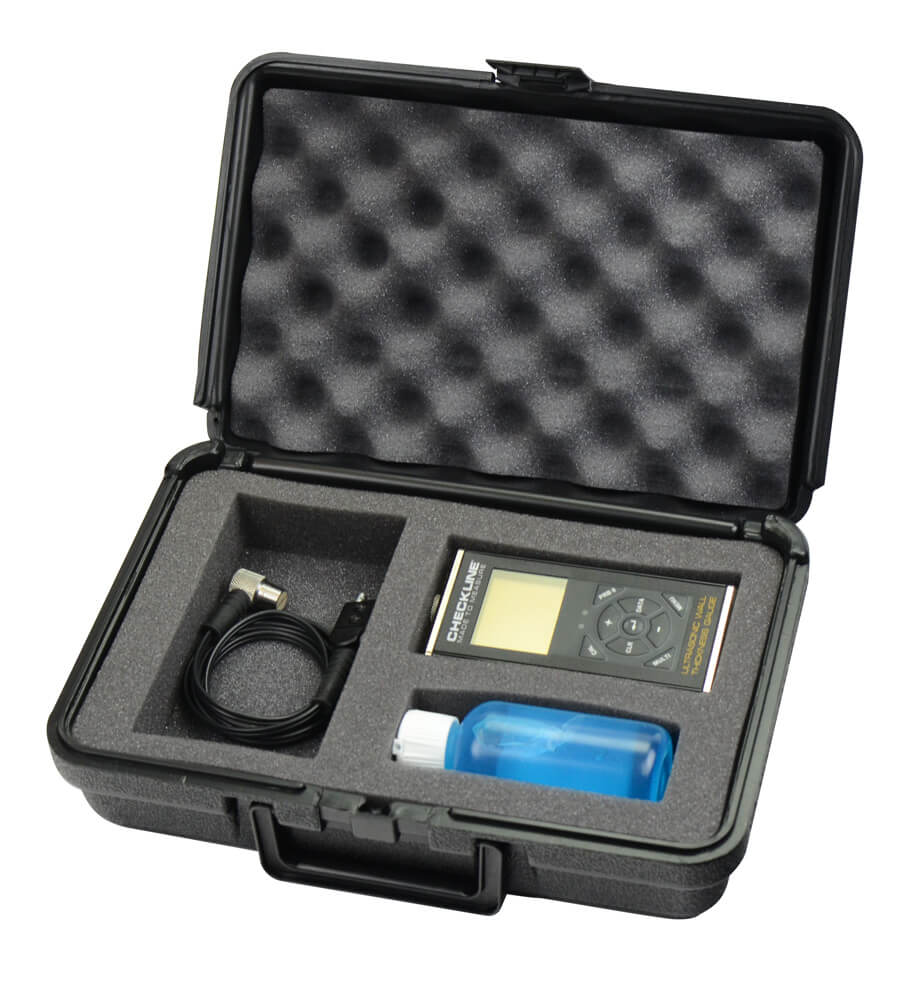
Kit Contents

- Checkline TI-25PX Adjustable Velocity Ultrasonic Wall Thickness Gauge
- Probe
- 4 oz. bottle of coupling fluid
- 2 AA batteries
- NIST-Traceable Calibration Certificate
- Carrying case
- Instruction Manual
|  |

Features

- Includes NIST Traceable Calibration Certificate
- 5 Year Warranty, CE-Certified and Made in USA
- Resolution of 0.001 inch (0.01 mm)
- Switch-selected units for inches or mm
- Selectable Backlight ON/OFF/AUTO
- Acoustic Velocity (calibration) is manually adjusted via the keypad
- Special-purpose probes are offered for a variety of applications (1 to 10 MHz)
- The Transducer (probe) is waterproof and can be submerged in shallow water
- The extruded aluminum housing is impact-resistant and environmentally sealed (IP 65)
to provide trouble-free operation under the toughest field conditions - For underwater surveying, an optional 50 ft (15 meter) underwater probe/cable is available
- High visibility LCD Display is readable in all lighting conditions and temps as low as 22 F (-30 C)
- LCD shows Thickness Value, Velocity Setting, Stability Indicator, Battery Indicator and units
- Operates on two (2) AA Batteries - 45 hours continuous operation

Specifications

Total Measuring Range
(Steel) | 0.025 - 36.000 inches
0.63 - 914.4 mm
(depends on material and transducer/probe type) | Measuring Range
(Steel) | 0.040-6.000 inches
1.00-150.0 mm
(with standard transducer T-102-2000) | | Resolution | 0.001 inch (0.01 mm) | | Measuring Mode | Pulse-Echo (P-E) | | Velocity Range | 0.0120 to .7300 in/s. 305 to 18,542 meters/sec | | Probe (Standard) | 1/4", 5 MHz Dual Element Transducer, actual wearface is 5/8" (17mm), p/n T-102-2000 | | Cable | 1.2m (4ft.) waterproof cable with non-polarized, quick-disconnect connectors | | Probes (optional) | 1 to 10 MHz, 3/16" up to 1 inch (custom probes available) | | Probe Wearface | PEEK (Polyethylethylkytone) | | LCD Display | Multi-function 7 segment 4.5 digit liquid crystal display with 0.500" digit height. Two 0.125 in14 segment fields for labels and values, and one 7 segment field for labels and values. Additional icons to indicate features and modes | | Display Backlight | Backlight is selectable on/off/auto, and selectable brightness (Lo, Med, Hi) options | | Display Update Rate | 10 Hz (10 updates/sec) | | Temp. Limits | Ambient: -30 to 75 C (-22 to 167 F)
Material: -20 to 100 C (0 to 200 F)
High temperature probes available | | Battery Type | 2x AA batteries (rechargeable batteries can be used) | | Battery Life | 45 hours continuous use | | Housing | Extruded aluminum body with nickel-plated aluminum end caps (gasket sealed) | | Housing Rating | IP65 | | Keypad | Sealed membrane that is resistant to both water and petroleum products
Seven or eight tactile-feedback keys | | Weight | 308 grams (11 ounces) | | Pulse Repetition Frequency (PRF) | 200 Hz (200 pulses/sec) | | Dimensions | 63.5 x 131.3 x 31.5 mm (2.5" x 5.17" x 1.25") | | Accessories | Probe/cable assembly, 4 oz. bottle of coupling fluid, NIST Calibration Certificate, 2 AA batteries, operating instructions, hard-plastic carrying case. | | Certifications | NIST Traceable and MIL-STD-45662A | | To Lock Settings | With gauge powered off, press and hold the "+" key while powering on the gauge
The LOCK icon will be illuminated on the Display | | To unLock Settings | With gauge powered off, press and hold the "-" key while powering on the gauge
The LOCK icon will turn off | | Warranty | Gauge: 5 Years
Probes: 90 Days |

Measuring Limits

 | Minimum Radius for Convex Surfaces | 0.350" (8.89 mm) | | Minimum Radius for Concave Surfaces | 3" (76.2 mm) | | Minimum Headroom | 1" (25.0 mm) | | Minimum Sample Diameter | 0.150" (3.8 mm) | | Minimum Substrate Thickness - F | na | | Minimum Substrate Thickness - NFe | na |

Related Products


Downloads

|
|
|