|
|
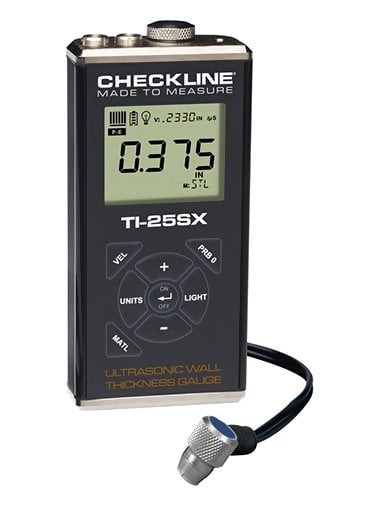
Checkline TI-25SX-WOP Ultrasonic Wall Thickness Gauge Complete Kit, without Probe
Price: $ 1,105.00

Includes NIST-Traceable Calibration Certificate, CE-Certified
5-Year Warranty, Made in USA
Datalogging: NO
Total Measuring Range (depends on material and transducer/probe type)
0.025 - 36.000 inches
0.63 - 914.4 mm | Measuring Range on Steel (with standard T-102-3300 probe)
0.025 - 6.00 inches
0.60 - 150.0 mm |
The Checkline TI-25SX allows the operator to select from 8 preset materials as well as program 2 custom material velocities allowing the user to tune the calibration to be optimized for a specific type of material. The calibration can be locked to prevent any accidental adjustments. The preset materials are as follows: - Steel 4340
- Stainless 303
- Aluminum 2024
- Cast Iron
- Plexiglass
| - PVC
- Polystyrene
- Polyurethane
- Custom1
- Custom2
|

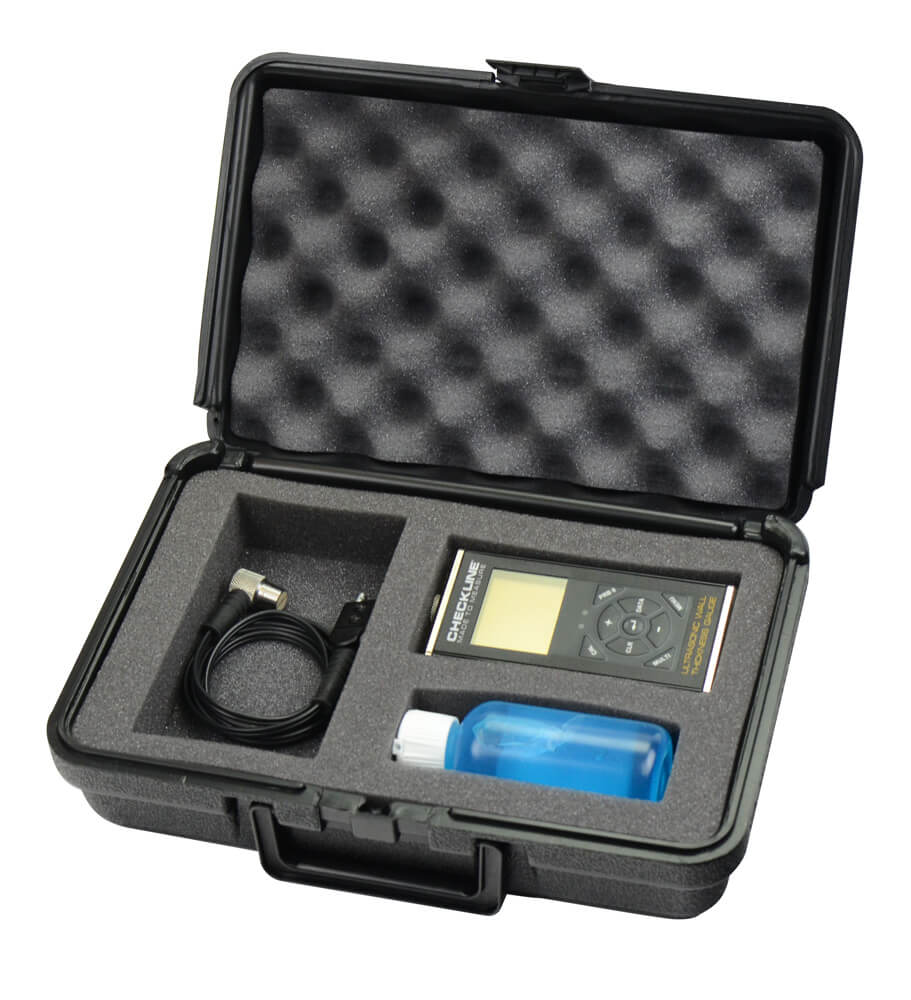
Kit Contents

- Checkline TI-25SX General Purpose Ultrasonic Wall Thickness Gauge
- Probe
- 4 oz. bottle of coupling fluid
- 2 AA batteries
- NIST-Traceable Calibration Certificate
- Carrying case
- Instruction Manual
|  |

Features

- Resolution of 0.001 inch (0.01 mm)
- The Transducer (probe) is waterproof and can be submerged in shallow water
- Special-purpose probes are offered for a variety of applications (1 to 10 MHz)
- Switch-selected units for inches or mm
- The extruded aluminum housing is impact-resistant and environmentally sealed (IP 65)
to provide trouble-free operation under the toughest field conditions - For underwater surveying, an optional 50 ft (15 meter) underwater probe/cable is available
- High visibility LCD Display is readable in all lighting conditions and temps as low as 22 F (-30 C)
- LCD shows Thickness Value, Velocity Setting, Stability Indicator, Battery Indicator and units
- Acoustic Velocity (calibration) is manually adjusted via the keypad
- 5 Year Warranty, CE-Certified and Made in USA
- Operates on two (2) AA Batteries - 45 hours continuous operation
- Selectable Backlight ON/OFF/AUTO
- Includes NIST Traceable Calibration Certificate

Specifications

Total Measuring Range
(Steel) | 0.025 - 36.000 inches
0.63 - 914.4 mm
(depends on material and transducer/probe type) | Measuring Range
(Steel) | 0.025-6.000 inches
0.60-150.0 mm
(with standard transducer T-102-3300) | | Resolution | 0.004 inch (0.1 mm) | | Measuring Mode | Pulse-Echo (P-E) | | Velocity Range | 0.0120 to .7300 in/s (305 to 18,542 m/sec) | | Probe (Standard) | 1/4", 5 MHz Dual Element Transducer, actual wearface is 5/8" (17mm), p/n T-102-3300 | | Probes (optional) | 1 to 10 MHz, 3/16" up to 1 inch (custom probes available) | | Probe Wearface | PEEK (Polyethylethylkytone) | | Cable | 1.2m (4ft.) waterproof cable with non-polarized, quick-disconnect connectors | | LCD Display | Multi-function 7 segment 4.5 digit liquid crystal display with 0.500" digit height. Two 0.125 in14 segment fields for labels and values, and one 7 segment field for labels and values. Additional icons to indicate features and modes | | Display Backlight | Backlight is selectable on/off/auto, and selectable brightness (Lo, Med, Hi) options | | Display Update Rate | 10 Hz (10 updates/sec) | | Temp. Limits | Ambient: -30 to 75 C (-22 to 167 F)
Material: -20 to 100 C (0 to 200 F)
High temperature probes available | | Battery Type | 2x AA batteries (rechargeable batteries can be used) | | Battery Life | 45 hours continuous use | | Weight | 308 grams (11 ounces) | | Dimensions | 63.5 x 131.3 x 31.5 mm (2.5" x 5.17" x 1.25") | | Accessories | Probe/cable assembly, 4 oz. bottle of coupling fluid, NIST Calibration Certificate, 2 AA batteries, operating instructions, hard-plastic carrying case. | | Housing | Extruded aluminum body with nickel-plated aluminum end caps (gasket sealed) | | Housing Rating | IP65 | | Certifications | NIST Traceable and MIL-STD-45662A | | Keypad | Sealed membrane that is resistant to both water and petroleum products
Seven or eight tactile-feedback keys | | Pulse Repetition Frequency (PRF) | 200 Hz (200 pulses/sec) | | Warranty | Gauge: 5 Years
Probes: 90 Days |

Measuring Limits
  | Minimum Radius for Convex Surfaces | 0.350" (8.89 mm) | | Minimum Radius for Concave Surfaces | 3" (76.2 mm) | | Minimum Headroom | 1" (25.0 mm) | | Minimum Sample Diameter | 0.150" (3.8 mm) | | Minimum Substrate Thickness - F | na | | Minimum Substrate Thickness - NFe | na |

Related Products


Downloads

|
|
|