|
|
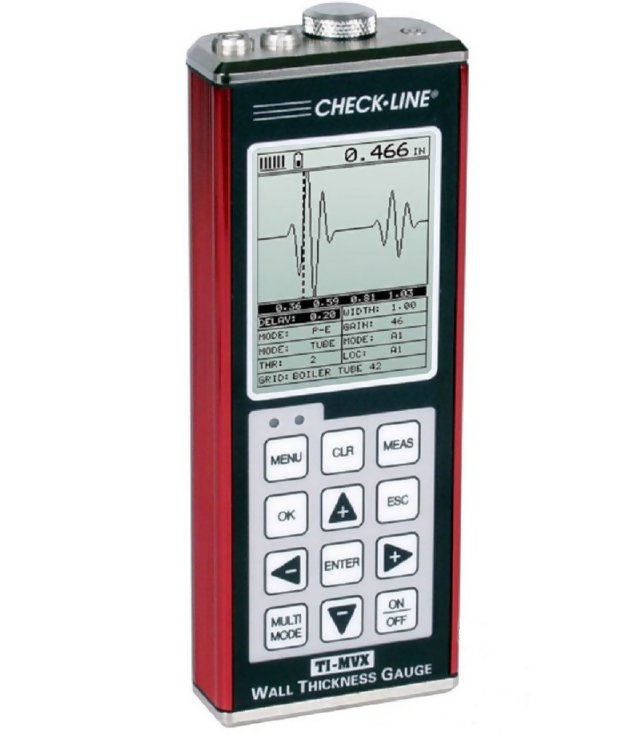
Checkline TI-MVX Ultrasonic Thickness Gauge with Enhanced Display with T-102-2700 Probe
Price: $ 2,850.00

Enhanced graphic scope Displays A Scan & B Scan for a cross section view
Range: 0.025 - 9.999" - 0.63 - 254.0 mm
Probe Sold Separately
Resolution:.001" (0.01 mm)
Datalogging: YES
The Checkline TI-MVX Ultrasonic Thickness Gauge with Enhanced Display offers a series of advanced features including A-Scan, B-Scan as well as a complete alphanumeric datalogging system with storage capacity of thousands of data values and A-scan captures. The Checkline TI-MVX TI-MVX Ultrasonic Thickness Gauge with Enhanced Display features the highest resolution graphic LCD on the market and is especially engineered for optimal ease of use. The TI-MVX Ultrasonic Thickness Gauge with Enhanced Display is supplied as a complete kit with all accessories in carrying case with FREE software, transfer cable and NIST-Traceable Calibration Certificate.

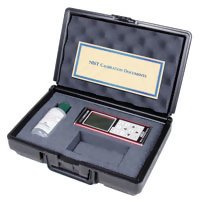
Kit Contents

- Checkline TI-MVX Ultrasonic Thickness Gauge With Enhanced Display
- 4 oz. bottle of coupling fluid
- 2 AA batteries
- NIST Calibration Certificate
- Data Transfer Software
- Serial Output
- Carrying case
- Instruction Manual
Probe Sold Separately |  |

Features

- The MVX is equipped with multiple viewing options to provide users with a complete set of inspection tools: (RF waveform, +/- Rectified waveform, Time based B-Scan, and Large Digits).
- The A-Scan rectified mode is commonly used for detecting flaws/pits in pulse-echo mode and measuring through paint and coatings in echo-echo mode.
- The time-based B-Scan feature of the MVX displays a cross section of the test material. It is commonly used to display the profile of the bottom surface of the test material.
- Built in hardware AGC gain control for through paint measurements in multi mode operation.
- The MVX has the ability to store 64 custom user defined setups. All factory setups can be selected, edited and saved to any setup location.
- CE Certified
- Use the visual alarm to set hi and lo limits for applications requiring specific tolerances. If the actual thickness value is above or below the limits, a red light is illuminated.
- Use the find feature to locate the detection point, while automatically adjusting the display to bring the signal into view.
- MVX also comes complete with our Windows PC software for transferring data to and from a PC.
- Includes Flaw Inspection - Prove Up Mode, (special probe required)
- The high speed scan feature speeds up the inspection process by making 32 measurements per second. Remove transducer from the tesst material, and display the minimum measurement scanned.
- Includes NIST Calibration Certificate
 Specifications Specifications
| Range in Steel* | Pulse-Echo Mode: Pit and Flaw detection measures from 0.63 to 254 millimeters (0.025 - 9.999inches)
Echo-Echo Mode: Thru Paint & coatings measures from 2.54 to 102 mm (0.1 - 4.0 inches).
Range will vary +/- depending on the thickness of the coating.
*Range varies by transducer, multiple transducers are required to cover entire range | | Resolution | .001 inches (0.01mm) | | Velocity Range | .0492 to .3936 in./ms
1250 to 9999 meters/sec | | Units | English & Metric | | Measurement Modes | Pulse-Echo (flaws, pits)
Echo-Echo (thru-paint) | | Transducer Types | Dual Element (1 to 10 MHz). | | Memory | 16 megabit non-volatile ram | | Memory capacity | 12,000 pages with 1 reading and waveform per page | | Power Source | Three 1.5V alkaline or 1.2V NiCad AA cells | | Battery Life | Typically operates for 150 hours on alkaline and 100 hours on NiCad | | Auto Power off | if idle 5 min | | Display | 1/8 in. VGA grayscale display 62 x 45.7mm | | Keyboard | Membrane switch with twelve tactile keys | | Case | Extruded aluminum body with nickel-plated aluminum end caps (gasket sealed). | | Operating Temperature | -14 to 140F (-10 to 60C) | | Weigth, net | 383 grams | | Dimensions | 63.5 W x 165 H x 31.5 D mm | | Warranty | 2 year limited | | Certification | CE Approved, Factory calibration traceable to national standards |
 Optional Accessories Optional Accessories


V-Block
Transducer Holder
- The V-Block transducer holder offers the operator greater control and repeatabily when measuring on pipes and other curved areas
|  |

 Downloads Downloads
|
|
|